
A Beginner’s Guide To Making Jam
First things first: what are the key ingredients?
“It couldn’t be simpler,” says Francesca Strange, co-founder of The Proof, a pudding delivery service based in east London. “The main ingredients are your fruit of choice and an equal quantity of sugar. For added depth of flavour or warmth, you can add various spices or ginger and some fruits like berries, which have lower levels of pectin, which is a natural starch in the skin of fruits which helps thicken jams and preserves. Some fruits require an acid substitution of lemon juice which also provides this essential pectin.”
Can you make any substitutions?
You can play around with the sugar a little bit if you need to, says Francesca. “Granulated sugar is perfect or you can use jam sugar which has added pectin – but be prepared for a firmer and thicker set.” Caster sugar also works, she says. However, Justine Murphy of MyMuyBueno prefers to make a refined sugar-free jam. “Traditionally jam is made using a ratio of equal measures of fruit to sugar,” she explains. “However, for me this is just way too much sugar and it’s not necessary. You can achieve a delicious jam using far less – you only need to use 5 tbsp of coconut sugar per 750g of fruit.” She also suggests using some chia seeds to help further thicken your jam if you’re going down this route.
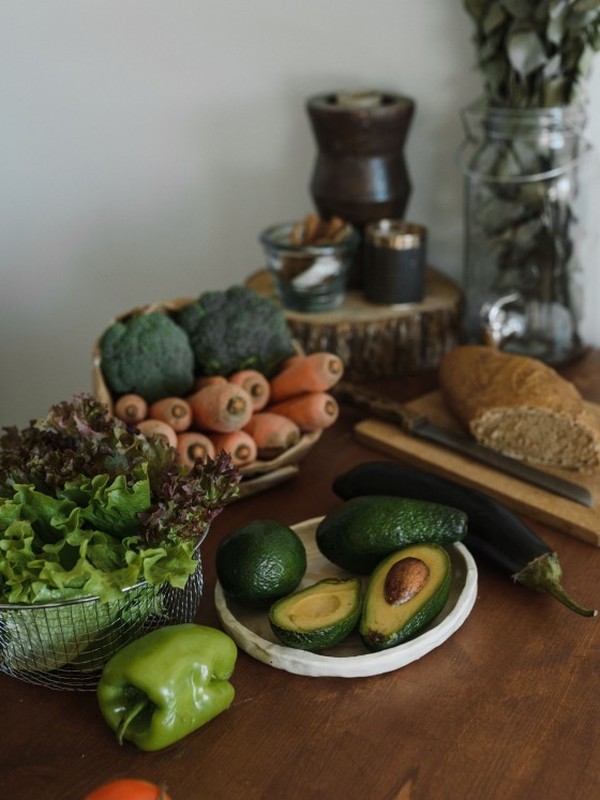
Which fruits work best?
If the taste is your primary concern, then always use fruits that are in season because these will make the most delicious jams. “Berries are wonderful and easy to work with, as are plums and figs,” says Francesca. “Forced rhubarb is also amazing to use in jam-making, as it provides a sweet yet earthy taste, which is just gorgeous. Jam is a flexible thing so most fruit works. Be bold and play around with different textures and combinations to see what you can create. At the moment, I love blackberry and bay and rhubarb and ginger, but you can’t beat a simple but beautiful raspberry jam,” she says.
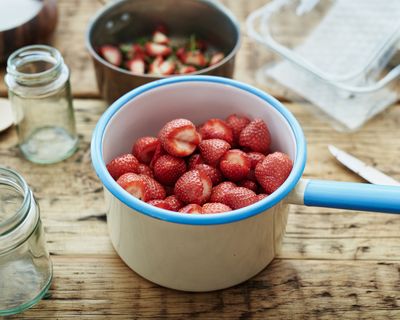
Justin suggests opting for fruits high in natural pectin, such as blackberries, blackcurrants, rhubarb. “It’s those that don’t carry as much sharpness and sweetness – such as strawberries – which need that helping hand with the pectin, so introducing some lemon juice helps to achieve this and thicken the jam,” she says. At the moment, she’s opting for seasonal combinations such as classic strawberry conserve, fig conserve and mixed berry jam.

MYMUYBUENO
Does frozen fruit work?
Absolutely, says Francesca. “You can make great jam from frozen fruit. Just don't let the fruit defrost before you start, because the wetness can cause your jam to be too runny. My personal preference is to use fresh, in-season fruit if at all possible as this yields the most delicious tasting jam of all.” Justine also suggests making sure to give your jam enough time in the pot to defrost, and using a potato masher to help break the berries apart.
What kitchen equipment do you need?
While jam/preserving pans are ideal if you have one, if you don’t, you can use a heavy-based saucepan, says Francesca. “It also helps if you have a digital thermometer to keep an eye on the optimum temperatures for jam making but, again, it’s not essential.” Justine suggests jam jars, a jam funnel and wax discs, if you’re planning to make a big batch.
Are there any pitfalls to avoid?
“There are a few things that can go wrong,” says Francesca. “The most obvious one is your jam not setting. This can be because there isn’t enough pectin in your fruit, so always add some lemon juice when working with soft skin fruits. But, if it doesn’t set, you can always call it a compote and try again another day! Overcooking the fruit can cause a burnt, bitter taste that will be hard to save. And finally, if you don’t sterilise your jam jar properly bacteria can remain in there and will cause mould on your jam.”
But there are solutions to some of these more common pitfalls. “If it’s too runny – and you have cooked it long enough – add some more pectin,” says Justine. “If it’s too thick then you can add some water and a little more lemon to try to loosen it.”
How long will it last for and how should it be stored?
If you have correctly stored your homemade jam in a sealed, sterilised jar this can last for a year or two – “although six months is generally where to draw the line because the flavour can be affected when left for longer,” Francesca explains. “Once opened it should be kept in the fridge and if you notice any signs of fermentation or mould then ditch it (or scrape the mould off if you’re brave enough).” Justine says to make sure to seal your jams with a wax disc and store in a cool dark place. “I love making fig conserve at this time of year, while they are in season, as it’ll last until Christmas – just in time for a festive cheese board.”
Any final tips?
Don’t worry about scum, which can form on top of the jam – it’s just trapped air, says Justine. “Many think you should remove it, but just stir your spoon clockwise until it all dissipates and is reduced back into your jam.”
“Don’t be scared of jam-making – it’s a fun and super easy skill to learn. Go wild with your flavours, add chilli or ginger and cinnamon and see how different additions can enhance or deepen the fruits that you know and love,” says Francesca. “And please, whatever you do, don't be tempted to stick your finger in your boiling pot of sugary fruit to try it – it will really, really hurt. I’ve got the scars to prove it.”
Inspired? Why not try one of these three at-home recipes...
Fail-Safe Plum Jam
Francesca Strange, The Proof
Put the quartered plums in a heavy saucepan with 450ml of cold water, cover pan with a lid, and cook over a low heat until the skins are soft, about 25 minutes.
Take off the lid; increase the heat and cook for about 20 minutes, until the volume of fruit has been reduced by two thirds. Stir occasionally to prevent the fruit from sticking to the pan.
Add sugar and heat gently to dissolve. Once dissolved bring to boil rapidly — a “rolling boil” — for 15-20 minutes, stirring occasionally, then test for setting. If you have a thermometer the temperature should be 105°C) Another way to test is by putting a tsp of your jam onto a plate that has been in the freezer for 30 minutes – it should wrinkle when you push it with your finger which means it’s ready.
Leave the jam to cool for 20 minutes before pouring into your pre-sterilised jars (many ways to do that but the easiest is put your clean jar and lid into an oven at 180°C for 15 minutes), putting a wax disc on top, then covering with cellophane and/or the lid.
Smother on everything and enjoy.
Visit The-Proof.com
Strawberry Conserve
Justine Murphy, MyMuyBueno
Cut your strawberries into halves, or quarters if they are large. As this is a conserve, you want to keep the fruit in pieces to give it texture. Add the sugar, chia seeds, lemon zest and a squeeze of juice to a saucepan. Stir well.
Put the pan on a medium heat and slowly melt the sugar, then increase the temperature to get the mixture boiling for a few minutes, stirring well while it does. Now turn off the heat and leave the conserve to thicken. Once cooled, store it in the fridge for up to a week.
If you want to keep the conserve for longer, pour it into a sterilised jar then pop a wax seal on top and it will last for a few months in a cool, dark place.
This is great on toast or as a topping on any breakfast bowl, as well as a thoughtful gift to give to friends. Be careful with strawberries when not in season, as when they are fairly white, this will yield a less vibrant result.
Raspberry Jam Cheesecake
To make the base, blitz the cashews, almonds and macadamias to small pieces in the food processor. Add the remaining ingredients and blend until everything is well combined and the mixture is sticky.
Press the mixture firmly and evenly, so it’s well compacted, into a round 20cm cake tin lined with parchment paper. Place in the freezer so the base can firm up.
To make the jam, stir the chia seeds into the warm water in a small bowl and leave to thicken. Blend the raspberries in the food processor until smooth, then add the syrup and continue to process. Once the chia seed mixture has thickened, add the raspberry purée and stir well. Place the jam in the fridge to firm up.
To make the cheesecake, drain and rinse the cashews, discarding the soaking water, then place them into your blender with the lemon juice, rice milk, syrup and salt.
In a saucepan, melt your cacao butter until it becomes liquid. Add this to the blender last and continue to blend well until the mixture is smooth and creamy, then gently fold in the lemon zest.
Pour half of your cheesecake mixture over the set base in the tin, then tap the whole tin on a flat surface to remove any air bubbles and settle the mixture evenly.
Add dollops of your jam then swirl it through the cheesecake in S movements with a toothpick for a marble effect. There should still be large patches of jam for the visual effect when cutting a slice, and also the taste of the fruit when eating it.
Pour the remaining cheesecake mixture over the top, repeat the marbling effect with the jam and add final flecks of lemon zest to the top. Place the tin back into the freezer and leave overnight for the cheesecake to set completely.
Remove it from the freezer 10 minutes before you wish to serve the cheesecake, allowing it ample time to thaw slightly and be easy to cut.
more from
Life


DISCLAIMER: We endeavour to always credit the correct original source of every image we use. If you think a credit may be incorrect, please contact us at info@sheerluxe.com.