A Beginner’s Guide To Making Bread
If you’ve never made bread before, where should you start?
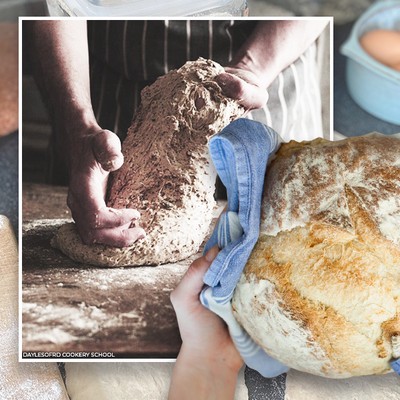
Even for more experienced home cooks, making bread can be a scary prospect. Start by doing some research on what kind of bread you’re interested in making and what equipment and ingredients are required. James Hearfield, chef at Daylesford Cookery School, also suggests sticking to just one type of flour to begin with: “It will help you get consistent results,” he argues. It may take you a couple of tries, he adds, but all the hard work will definitely be worth it – persistence is key.
Which kind of flour is best?
Social Pantry founder Alex Head says the type of flour required depends on the bread you are making. Different breads require different ingredients, which is why it’s important to stick to a single recipe so you don’t overcomplicate it. “If you have a particular flour sitting in your cupboard, you will be able to find a recipe to use it for,” she adds. James, meanwhile, recommends first time bread makers go with strong flour for lighter bread, as it’ll give you an easier dough to work with. “You can also use dried yeast instead of fresh if you’re unable to find it,” he adds. Just make sure to halve the amount of dried to fresh, if the recipe you’re following doesn’t specify.
Is a bread maker necessary?
A bread maker may be a handy tool to have if you want to cut down prep time but, as Alex says, you don’t need one to make great bread. Making bread by hand requires a few hours to prep, and a lot of physical kneading to develop the gluten that ultimately gives it structure. With a bread machine, simply load in the ingredients, and watch it do the hard work for you. However, don't be surprised if the shape of your loaf is affected or uneven.
What’s the secret to a really good bread?
According to Alex, the evidence is usually in the proof. “Find a nice warm place in your house, near your boiler or a place where it’ll be nice and cosy. Without a good proof, your loaf is in danger of turning out heavy.” It’s also about patience, as well as having the right knowledge and time to practice, so don’t beat yourself up if your first go isn’t perfect.
What exactly is proving?
“In bread baking terms, proving means to allow the bread dough to rise. Specifically, it refers to the fermentation action of the yeast. In basic yeast bread recipes, the dough will be proved two times, during which time the bread is allowed to rise,” explains James. Don’t be tempted to cheat or use a shortcut, either, and be sure to double check the instructions in the recipe for specific timings.
How should you avoid a soggy bottom?
“When you remove the bread from the oven, leave it in the tin for five minutes and it will steam itself free,” advises James. “Once the bread is removed from the tin, put it onto a cooling rack and allow it to cool down properly. This will prevent a soggy bottom and ensure the loaf is cooked all the way through.” Be sure to invest in a sturdy, good quality baking tin, too. Not only do they heat up faster, they retain a higher temperature to keep the bread crisp.
What makes a loaf crusty?
Alex and James both suggest adding water to your bake to get a better, crispier crust. “Try adding a few ice-cubes in the bottom of the oven,” says James. This creates steam which not only builds the crust, but also keeps it elastic so the bread can rise and reach its full volume. Depending how much steam there is, and how long it circulates in your oven, will determine the thickness of your crust. Alex advises sprinkling a few drops of water on the loaf ahead of baking for a similar effect.
What is the most common mistake people make when baking bread?
It's a learning process but, as Alex points out, people tend to think break making is complicated. “It really doesn’t have to be. It can be simple and quick and is always very satisfying,” she says. Sometimes people do forget to add enough water to their dough, however, which tends to leave bread dry. To combat this, when kneading, make sure it feels soft and stretchy. If it feels tough and hard to move around, add a bit more moisture.
What’s the difference between savoury and sweet bread?
“Personally, I love making savoury breads, but mixing it up with the occasional sweet version is fun, too,” says Alex. “There was a real trend last year for Chocolate Babka, and some of the London bakeries were nailing it. At Social Pantry we created a Salted Chocolate and Pistachio Babka Loaf as a Christmas alternative.” While it’s possible to add extra ingredients to mix up a tried and tested recipe, says James, if you opt to go freestyle, make sure you add them in at the right time. “Salty ingredients like bacon can kill the yeast, for example, so always do the first proof without them. Proceed by adding them to the second.”
What are three ways to mix up a recipe?
‘'Seeds, and lots of them,” suggests Alex. “Pumpkin and sunflower seeds are my favourite to add a lovely crunchy texture. Caraway seeds add a lovely taste, too. Otherwise, chopped olives are a classic and sundried tomatoes also work well for that Mediterranean flavour. For something sweet, mix through some chunky chocolate – it’s a great addition to a simple soda bread.”
Any last words of wisdom?
“Use extra flour to help you knead,” suggests James. “Just stick with the kneading process and the stickiness will go away when the gluten is up to strength.” Always remember to take it step by step and don’t stray too far from the instructions, too. “When it comes to equipment, always use a wide large bowl so that you have plenty of space and can mix generously,” adds Alex. “It’ll make the bread much lighter.”
Visit Daylesford.com
Visit SocialPantry.co.uk
Inspired? Why not try one of these easy bread recipes...
White Soda Bread
INGREDIENTS
450g of plain white flour
1 tsp of bicarbonate of soda
1 tsp of salt
400ml of buttermilk
METHOD
1. Mix all dry ingredients in a bowl, make a well in the centre and pour in the buttermilk.
2. Using your hand, make circular movements until the mixture has all come together. The dough should be soft-ish. Turn onto a well-floured work surface.
3. Gently shape the dough, and pat into a 4cm round.
4. Cut a cross on the top and prick the four corners.
5. Bake in the oven at 250°C for 15 minutes and then a further 30 minutes at 200°C.
6. When cooked, tap the bottom of the loaf to see if it sounds hollow.
7. Cool, and enjoy with lots of butter and jam.
Flatbreads
(Makes 10-12 flatbreads)
INGREDIENTS
350g of self-raising flour
350g of yogurt
½ tsp of baking powder
Pinch of salt
METHOD
1. Mix together all the ingredients and shape into a ball
2. On a floured surface cut the dough in half, and leave half aside
3. Cut into six and roll into small balls
4. Gently press each ball into a flatbread shape
5. Fry on a medium heat in a dry frying pan until brown and crispy on each side
SERVE WITH:
Garlic butter and some fresh pasta, or with a homemade curry or stew.
Recipes Courtesy of Social Pantry
INSPIRATION CREDITS: Social Pantry, Daylesford Cookery School
DISCLAIMER: We endeavour to always credit the correct original source of every image we use. If you think a credit may be incorrect, please contact us at info@sheerluxe.com.
