An Expert Guide To Colour Correcting
Understand What It Does
“Colour corrector is an underrated, must-have product. If your skin is colour-corrected the right way, your concealer and foundation don’t have to work as hard. The basic theory is that you can use opposite colours to cancel each other out, based on the colour wheel. Instead of trying to cover discoloration with full-coverage foundation and concealer, first you balance out your skin, resulting in a smoother, more natural-looking base.” – Drita Paljevic, director of artistry & make-up at Kevyn Aucoin
Choose The Right One For You
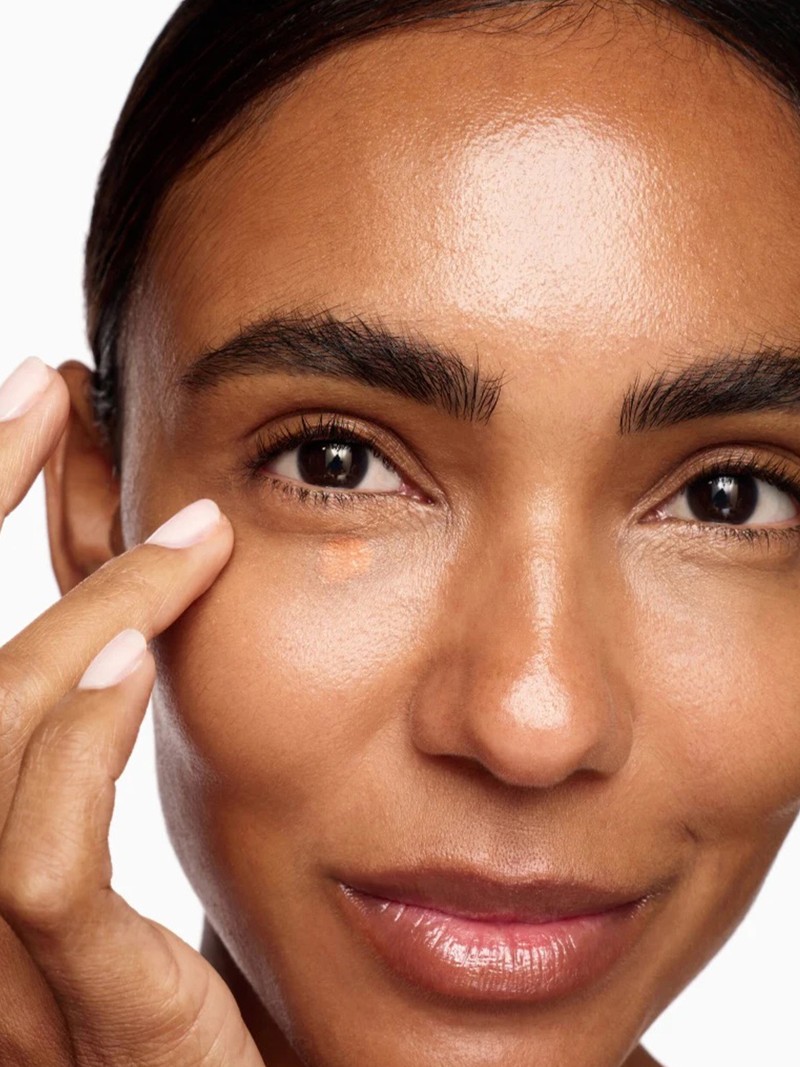
“Dark circles or melasma with blue or purple undertones can be neutralised using an orange-based shade. If you have light skin, try peach. On medium skin, salmon works best. For deeper skin, look for a more true-orange colour corrector. If redness is a concern, light green can balance that out. If you’re experiencing purple undertones beneath the eyes, a light yellow colour corrector will make all the difference, working to brighten.” – Claudia Neacsu, make-up artist
Use It Alongside Concealer For The Best Results
“Concealer and corrector are actually very different. Concealer works in tones, not undertones. Tones will define lightness and darkness, whereas undertones define colours. Colour correcting always comes before concealer. You need to correct the undertone first and then work on tones. For instance, if you apply a light concealer on purple dark circles, it will only make them look grey and worse overall. Instead, start by correcting the colour first, then layer your concealer over the top.” – Claudia
Tackle Spots With Care
“Blemishes are tricky as they require concealer and colour corrector because you will be dealing with discoloration and texture. For texture, try to very gently exfoliate before applying make-up, then use a thin layer of green colour corrector. Tap in with a small brush or your fingertip – this is a targeted approach that neutralises the blemish itself, rather than the area around it. Then layer concealer over the top.” – Drita
Work In Thin Layers
“Colour correctors are typically very pigmented, so you only need a small amount of product. By working in thin layers, you can ensure you’re neutralising your skin tone, rather than creating a build-up of colour-correcting hues like green or peach. Working in thin layers means the product won’t settle into fine lines and will be easier to blend out, so there’s no chance of harsh edges peeking through your foundation or concealer once you’ve finished your base.” – Drita
Take A Less-Is-More Approach
“Focus less on ‘covering’ and more on taking the edge off any discoloration. Remember that colour correcting is just neutralising the area and that concealer will still be needed to perfect the complexion afterwards – so don’t panic if things don’t look perfect after the colour-corrector stage.” – Drita
Consider The Order You Apply Your Products
“I always start with skincare, and my next step before foundation is colour correcting. I like to even out the skin before applying any base make-up. This way, I ensure my canvas is well neutralised and everything I am applying on top looks harmonious.” – Claudia
Follow @CLAUDIANEACSU & @GLAMOURBYDRITA
SHOP THE COLOUR-CORRECTING EDIT


DISCLAIMER: We endeavour to always credit the correct original source of every image we use. If you think a credit may be incorrect, please contact us at info@sheerluxe.com.
/https%3A%2F%2Fsheerluxe.com%2Fsites%2Fsheerluxe%2Ffiles%2Fwebsite-images%2F2025%2F03%2Fsign-up-pop-up.jpg)
