7 Steps For Upcycling Furniture
STEP 1: KNOW WHAT YOU’RE BUYING
With all of us thinking more sustainably when it comes to what we own, the idea of purchasing second-hand or pre-loved furniture to transform into something we’ll cherish has never been more appealing. Amid the current circumstances, it’s also important to remember there’s a huge used furniture market online, with some sites set up for people to offer pieces for free. Just stay flexible if you’re looking for a really unique piece: if something looks shabby because of a bad or fading paint job, or it has surface scratches, you can easily transform it with a little sanding or painting. The only thing to check thoroughly is that the furniture is structurally sound – particularly if you intend to use it practically instead of decoratively. For example, if there are holes in older wooden furniture, it’s possible it has woodworm, and is no longer fit for purpose.
STEP 2: FIND THE RIGHT TOOLS
Before you get started, check you’ve got all the appropriate materials to ensure a professional finish. This might include:
-
Low tack masking tape (or Frog tape)
-
Dust brush
-
Gloves
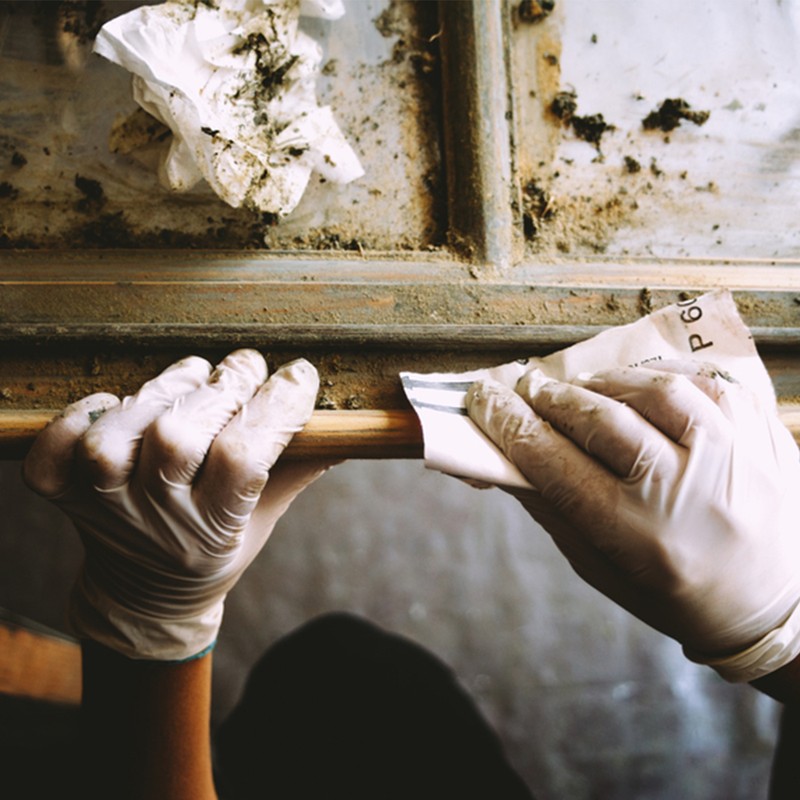
STEP 3: PREPARE THE SURFACES
-
Start by laying down a dust sheet to protect any areas you don’t want to get any paint or dust on. Then, remove any obvious dust, cobwebs or dirt from your chosen piece.
-
If you’ve decided your piece is in need of a paint job – or you want to change the colour to make it more appropriate for your home – priming the surfaces is the first job on the list. If it’s an old or second-hand piece, it’s likely to have had treatments on it in the past which may contaminate the new paint or varnish and even cause a reaction – a common upcycling mistake.
-
For wood, start by gently sanding the surfaces to remove any rough edges or nicks.
-
Then, remove the excess dust using a dust brush.
-
Apply a thin layer of primer on all prepared surfaces you intend to paint. Leave to dry for two to four hours before applying another. This will help the paint stick evenly and make the colour appear bolder. Leave the second coat to dry for two to four hours, too.
-
Once the primer is dry, sand the surfaces again and remove the excess dust.
STEP 4: GET READY, SET, PAINT
-
Use masking tape to protect areas that you don’t want to paint including handles or feet. If you want to paint a pattern, use the tape to section off the parts that will form your pattern.
-
Paint the first colour and wait until it’s dry before you put more masking tape on for the second colour.
-
If you’re painting a cabinet, paint the drawers first. While these are drying you can move on to the main unit. You’ll only need two coats for an even covering of colour (just remember to wait until your first coats are completely dry before painting second coats of each colour).
-
Consider using a specific paint for non-rusting metal pieces (typically outdoor or garden furniture), such as galvanised steel, aluminium, copper and brass. Some of these paints come in sprays or aerosols – so remember to wear a mask, and conduct the process in a well-ventilated, or preferably outdoor, space. Also, remove any rust or chipped paint with a wire brush before sanding down to prepare.
-
When using oil-based paint, natural-hair paint brushes will give you a better finish. However, when used with water-based or latex paint, natural bristles will absorb the water and become limp. Meanwhile, cheaper brushes don’t hold as much paint as higher quality ones, so the job is likely to take longer. Look out for tapered ends, which are an indicator of higher quality and will give you more control, too.
-
If you’re not sure how much paint you’ll need, try using an online paint calculator like this. Paint smaller areas with a brush and larger areas with a roller to save time.
STEP 5: FINISH THE JOB
-
While most modern-day paint formulas offer a decent finish on their own, good quality wood pieces should always be sealed using a finishing product, such as wax or varnish. It’s not compulsory – and might not be appropriate if you’re going for a shabby-chic or worn look – but more contemporary, polished pieces may well demand it.
-
Think about how to give your piece some individual character. You could fade a new coat of paint with sandpaper to make it look more worn in, focusing in particular on areas that would be most touched, such as handles and doors.
STEP 6: CONSIDER WALLPAPER
If the furniture you’re trying to upcycle is made from MDF or veneer, and can’t be fully sanded down, wallpaper could be a more versatile option.
-
Start by gently sanding any lumps or bumps off with low-grit sandpaper, before unscrewing any handles and cleaning away the dust.
-
Roll out your wallpaper onto a clean table or flat, hard surface.
-
Take your piece and place it front face down on the back of your item. Mark around it with a light pencil, making sure to make an indent with the pencil where any handle or door screws should be.
-
Using a Stanley knife, carefully cut out your drawer shape.
-
Mix the required amount of wallpaper paste and then spread the paste onto the paper with a paste brush or roller.
-
Stick in place and spread out from the middle using a brush or roller
-
If you don’t fancy getting messy, sticky-back plastic can easily be cut to shape with a Stanley knife – just peel off the backing and stick it in place.
STEP 7: THINK ABOUT THE SMALLER DETAILS
Perhaps a paint job isn’t what’s required to make the piece more suitable for your home. For cupboards or drawers, for example, it might be that a set of new door handles is all that’s needed to transform it. For chairs and sofas, consider whether re-upholstery or swapping the arms or legs could be the answer. For glassware, using marble paint or even washi tape can transform the look – as can a thorough, deep clean for older, antique pieces.
Fancy watching a step-by-step guide? Click here.
DISCLAIMER: We endeavour to always credit the correct original source of every image we use. If you think a credit may be incorrect, please contact us at info@sheerluxe.com.
/https%3A%2F%2Fsheerluxe.com%2Fsites%2Fsheerluxe%2Ffiles%2Fwebsite-images%2F2025%2F03%2Fsign-up-pop-up.jpg)
