/
7 Flour-Free Bakes To Make At Home
Just because you might be struggling to get hold of flour doesn’t mean home baking is out of the question. From lemon polenta cake to chocolate orange cheesecake, here are seven flour-free recipes to try now.
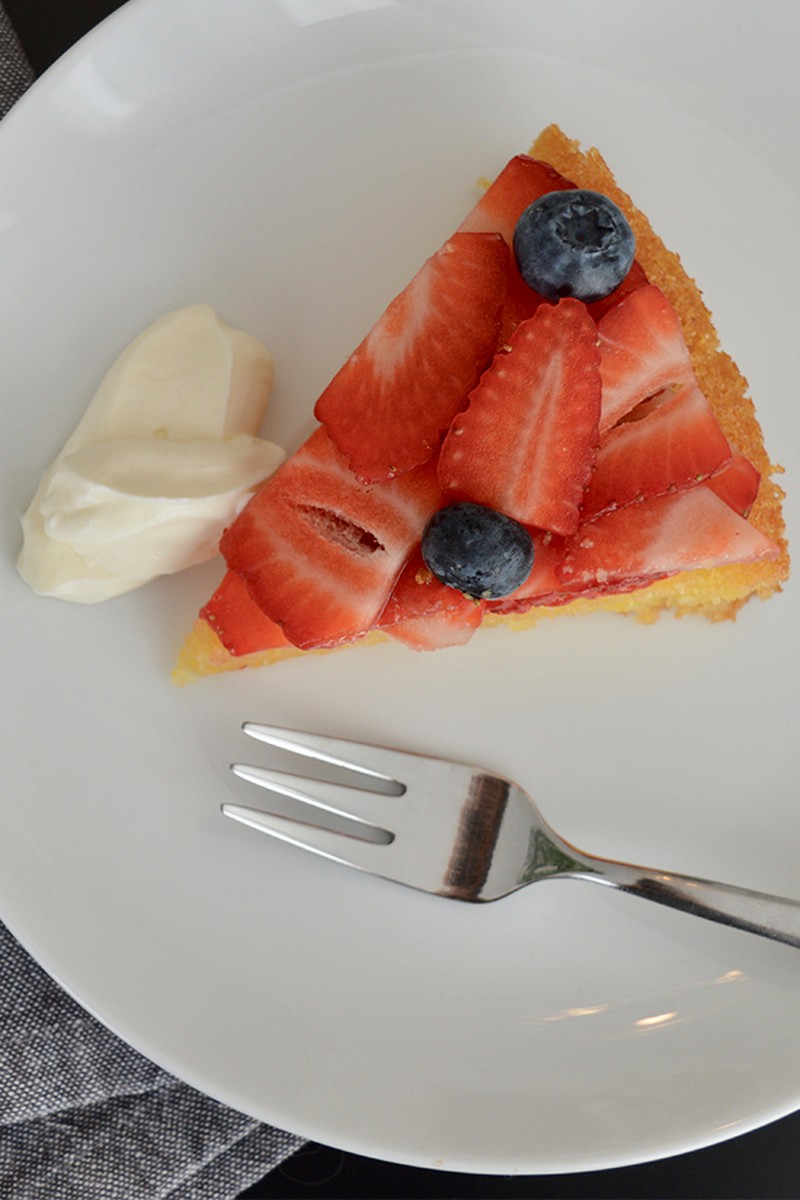
Lemon Polenta Cake, David Coutts of The Runnymede on Thames
INGREDIENTS
For the cake:
- 225g of caster sugar
- 225g of butter
- 200g of ground almonds
- 125g of fine polenta
- 1 tsp of baking powder
- 3 eggs
- 1 lemon (juice and zest)
For the syrup:
- 200ml of lemon juice
- 150g of sugar
METHOD
- Pre-heat the oven to 160°C.
- Butter two 6in cake tins and flour with polenta.
- Cream the butter and sugar until white.
- Beat the eggs and add them little by little.
- Gradually add the lemon juice and grated zest.
- Sieve the dry ingredients and fold them into the mixture.
- Divide the mixture between the tins.
- Bake at 160°C for approximately 30 minutes.
- Boil the lemon juice and sugar then pour the mixture over the cake as soon as it comes out of the oven.
- Once cooled, remove the cakes from the tins, dust with icing sugar and serve with fresh fruit and crème fraîche.
Visit RunnymedeHotel.com
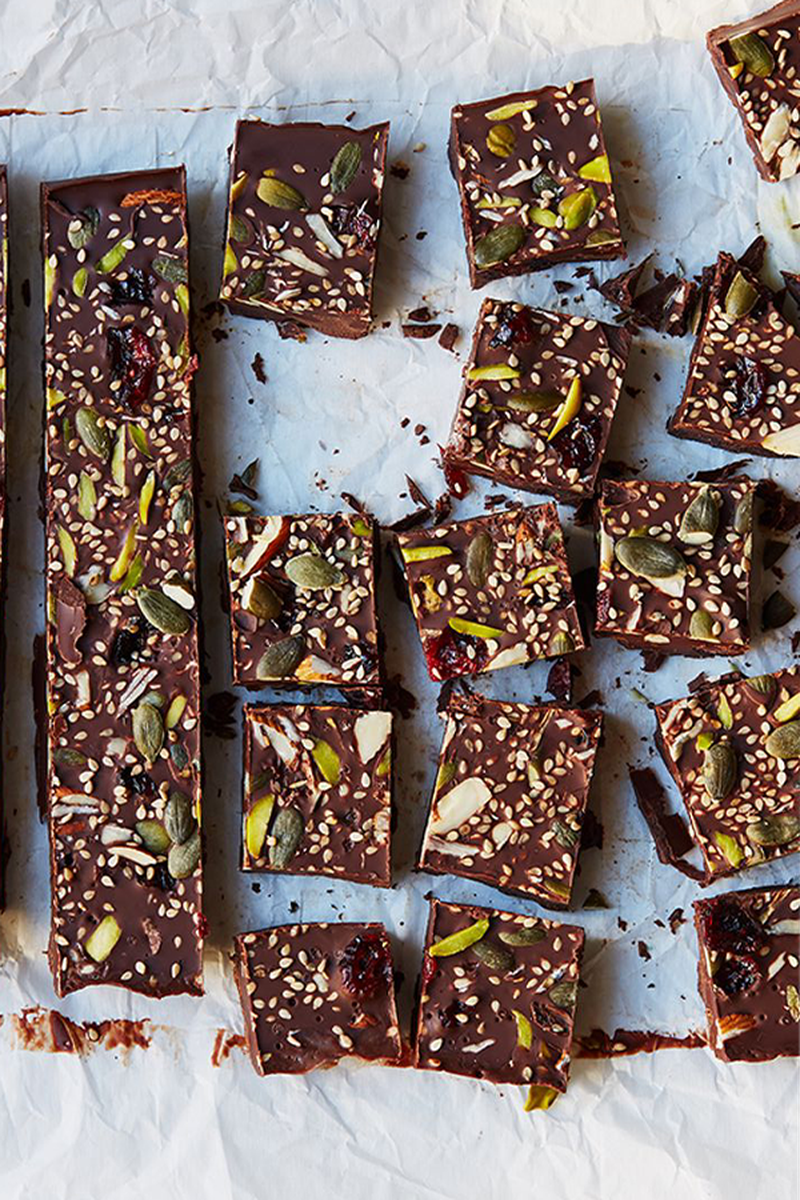
Chocolate & Coconut Seeded Fudge, Vita Coco
INGREDIENTS
- 400g of dark chocolate
- 3 tbsp of coconut oil
- 50g of almonds/hazelnuts/pecans, skin on and roughly chopped
- 35g of pumpkin seeds/sesame seeds
- Zest of 1 orange
- 1 tbsp of maple syrup/honey
- 75g of dried cranberries/raisins/apricots
- Pinch of sea salt
METHOD
- Grease and line a 25cm x 15cm baking tray (or similar depending on how thick you want your fudge to be).
- Break up your chocolate into pieces and place into a small heatproof bowl over a saucepan of simmering water to melt.
- Once melted remove from the heat and add the coconut oil, orange zest, salt and maple syrup.
- Pour the chocolate mixture into the prepared baking tray and then scatter over your nuts, seeds and dried fruits to cover the surface.
- Place into the fridge for an hour to set, then remove, slice and enjoy.
Visit VitaCoco.com
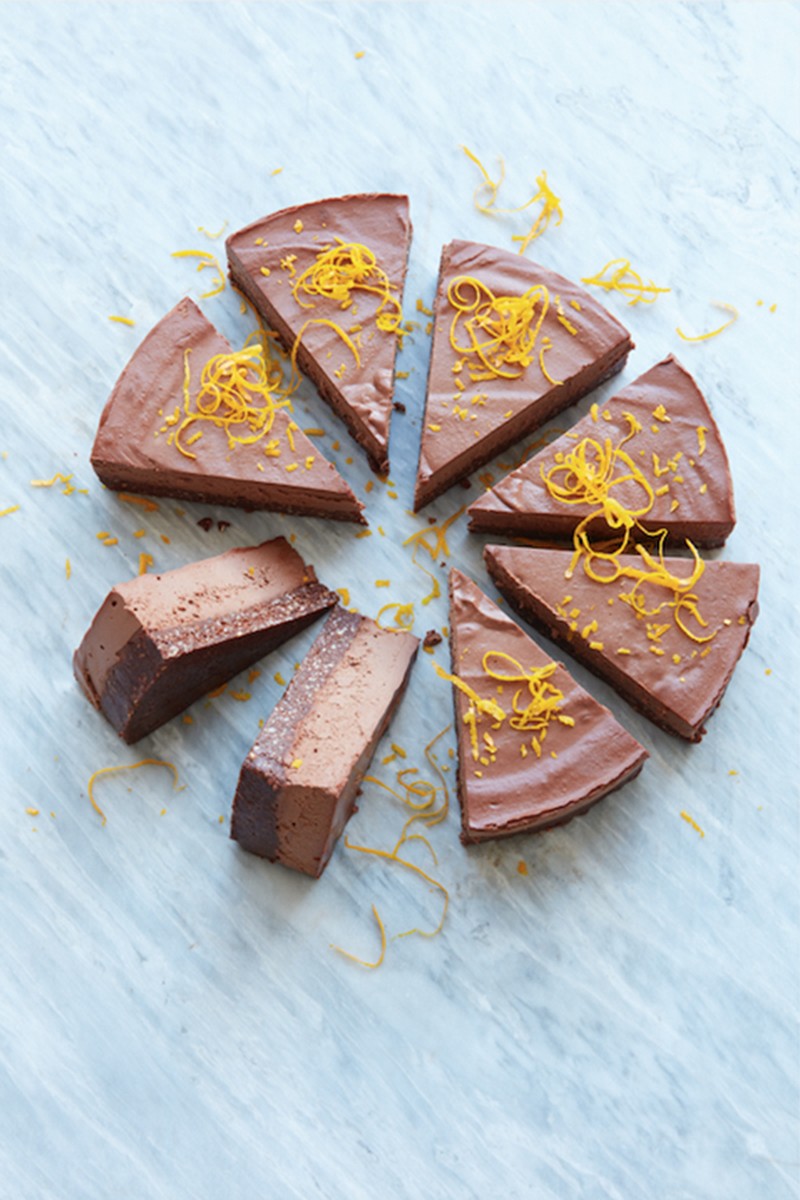
Chocolate Orange Cheesecake, Justine Murphy of Mymuybueno
INGREDIENTS
For the base:
- 100g of pecans
- 100g of almonds
- 80g of desiccated coconut
- 2 of tbsp cacao powder
- 100g of medjool dates, pitted
- 1 tsp of vanilla powder
- Pinch of Himalayan salt
- 100g of brown rice syrup or maple syrup
For the filling:
- 400g of cashews, soaked in water overnight
- 100g of brown rice syrup or maple syrup
- 6 tbsp of carton coconut milk
- 70g of cacao powder
- Pinch of Himalayan salt
- 100g of cacao butter
- 100ml of fresh orange juice
- 1 tsp of orange extract
For the topping:
- 1 orange
METHOD
- Line a 20cm cake tin with parchment paper. In the food processor, blend the pecans and almonds into small pieces. Add all the other ingredients and process until well combined and sticky. Press the mixture firmly and evenly into the base of the tin so it’s well compacted and place in the freezer to firm up.
- To make the filling, drain and rinse the cashews, discarding the soaking water, then blitz them in the processor with the syrup, coconut milk, cacao and salt.
- In a saucepan, melt your cacao butter until it becomes liquid. Add this to the processor last and continue to blend until the mixture is smooth and creamy.
- Add the orange juice and extract and then blend again until well incorporated.
- Pour the filling over the base and tap the whole tin down on the counter firmly to release any air bubbles and help to distribute it evenly in the tin.
- Place the cheesecake back into the freezer and leave overnight to completely firm up. Remove from the freezer at least 10 minutes before you wish to serve the cheesecake, allowing it ample time to thaw and be easy to cut.
- Before serving, zest the orange directly over the cheesecake so that the oils and juice release over the cake. Cover it generously, being careful not to include any white pith as this is bitter.
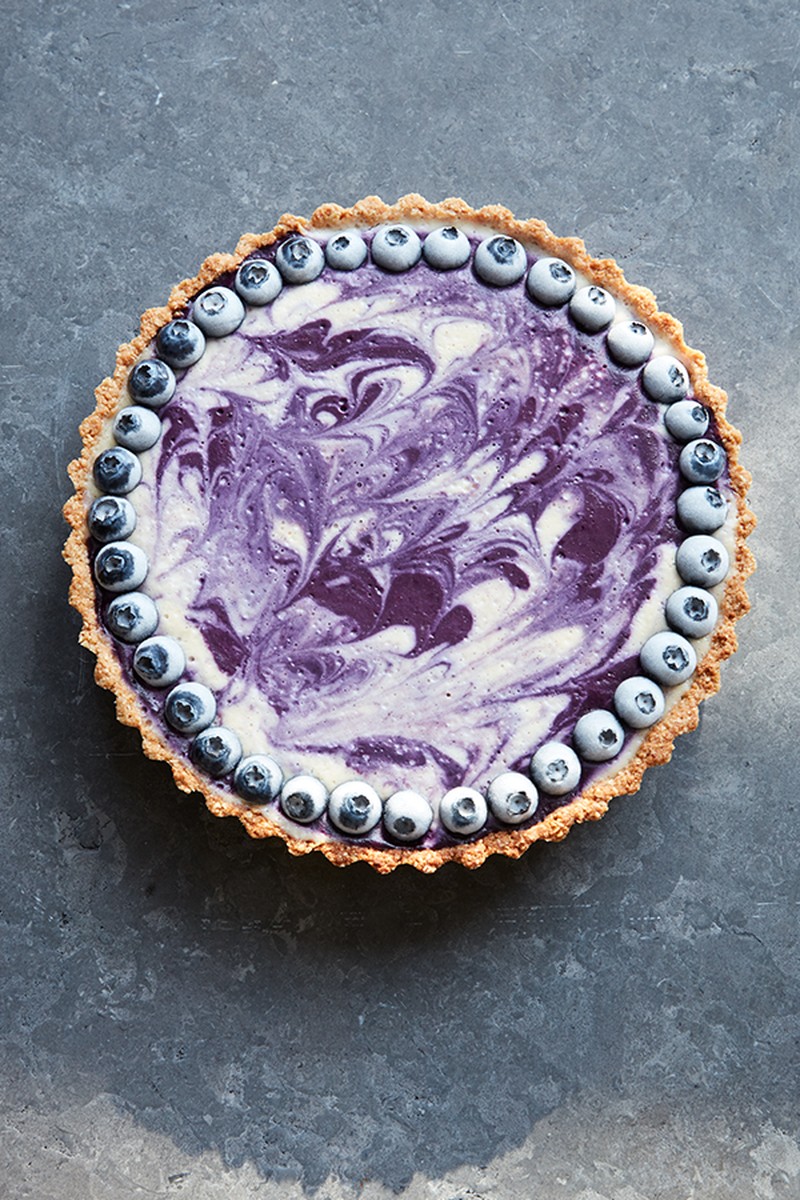
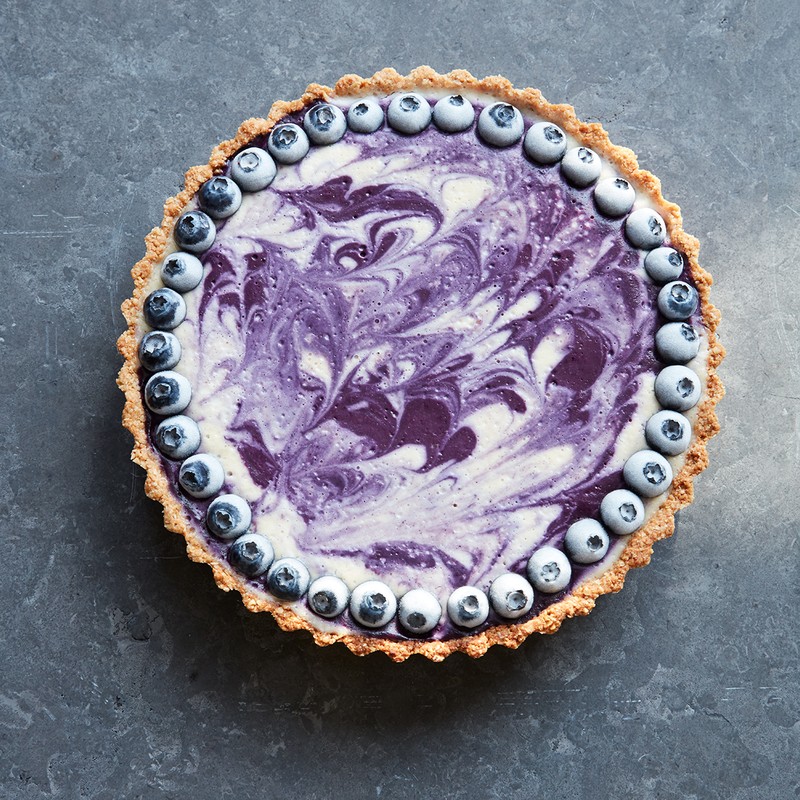
Blueberry Tart
INGREDIENTS
- 150g of jumbo rolled oats
- 50g of ground almonds
- 25g of desiccated coconut
- 50g of maple syrup
- 50g of coconut oil, melted
- Pinch of Himalayan salt
For the filling
- 350g of cashews, soaked in water overnight
- 100ml of coconut oil, melted
- 100ml of carton coconut milk
- 200ml of water
- 250g of brown rice syrup or maple syrup
- Pinch of Himalayan salt
- ¼ tsp of vanilla powder
- 2 tbsp of lemon juice
- 3 tbsp of blueberry powder
- 400g of fresh blueberries, to decorate
METHOD
- Preheat your oven to 180°C. Lightly grease a 20cm fluted loose-bottomed tart tin with coconut oil, then line it with parchment paper.
- To make the base, add the rolled oats to your food processor and whizz up to a flour-like texture. Add the remaining ingredients and blend until well combined.
- Press the mixture into your prepared tart tin evenly and prick the base a few times with a fork, place onto a baking tray, then bake in the preheated oven for 10 minutes or until golden brown. Remove it from the oven and leave in the tin for 10 minutes to cool, then gently turn the base out and leave it to cool completely on a wire rack.
- While the base is cooling, drain and rinse the cashews, discarding the soaking water, then process them in a blender with the melted coconut oil, coconut milk, water, syrup and salt until smooth.
- You now need to separate the mixture. Pour half of it into a jug and stir in the vanilla powder and lemon juice. Add the blueberry powder to the other half of the mixture, which is still in the blender, with an extra tablespoon of water and blend until smooth, then pour into another jug.
- Holding both jugs, one in each hand, pour the filling mixtures over the cooled tart base, ensuring the vanilla and blueberry mixtures are layered and dolloped evenly. Swirl them together with a toothpick in ‘S’ movements to get a beautiful marbled effect –less is more, so try not to overdo this.
- Place the tart in the freezer for 15 minutes, then as the cheesecake mixture starts to set you can add the fresh blueberries, pressing them very gently into the filling around the edge. Place the decorated tart back into the freezer and leave overnight to completely firm up.
- Remove it from the freezer 10 minutes before you wish to serve the tart, allowing it ample time to thaw and become easy to cut.
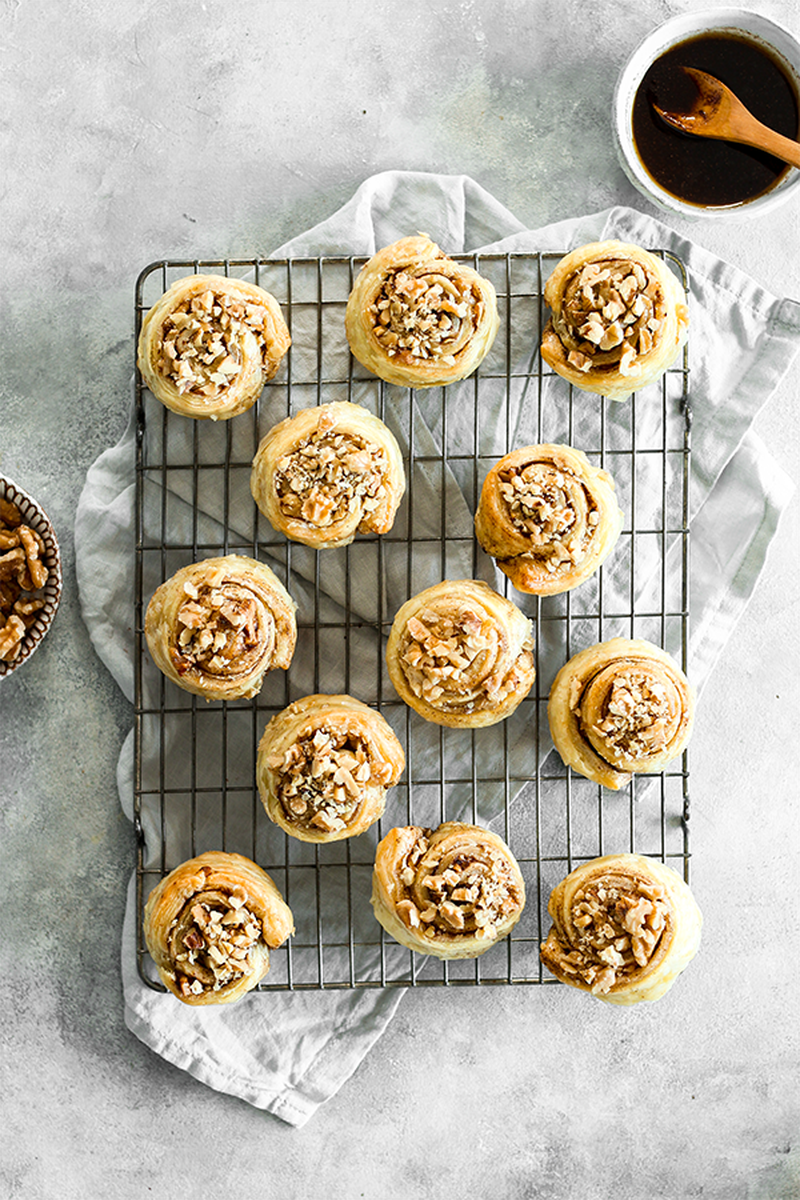
Walnut & Cinnamon Puff Pastry Buns, California Walnuts
INGREDIENTS
- 2 rolls of puff pastry
- 250g of walnuts, chopped
- 4 tbsp of dairy free butter
- 1.5 tsp of ground cinnamon
- 2 tsp of vanilla extract
- 2 tbsp of maple syrup and more for glazing
- 2 tbsp of light brown sugar
METHOD
- Preheat the oven to 180°C and lightly grease a muffin tin.
- Next, melt the butter in the microwave and combine with the cinnamon, vanilla extract, maple syrup and light brown sugar.
- Roll the sheets of puff pastry out and brush the butter mixture on top so they are both completely covered. Now sprinkle 2/3 of the chopped walnuts over the two sheets.
- With the longest side facing you roll each sheet up into a tight log. Repeat with the second.
- Cut each roll into 6 pieces and place each piece into the muffin tin. Place the tin in the oven and bake for 25-30 minutes.
- Once cooled slightly, remove from the tin, glaze with maple syrup and top with the remaining chopped walnuts.
Visit CaliforniaWalnuts.co.uk
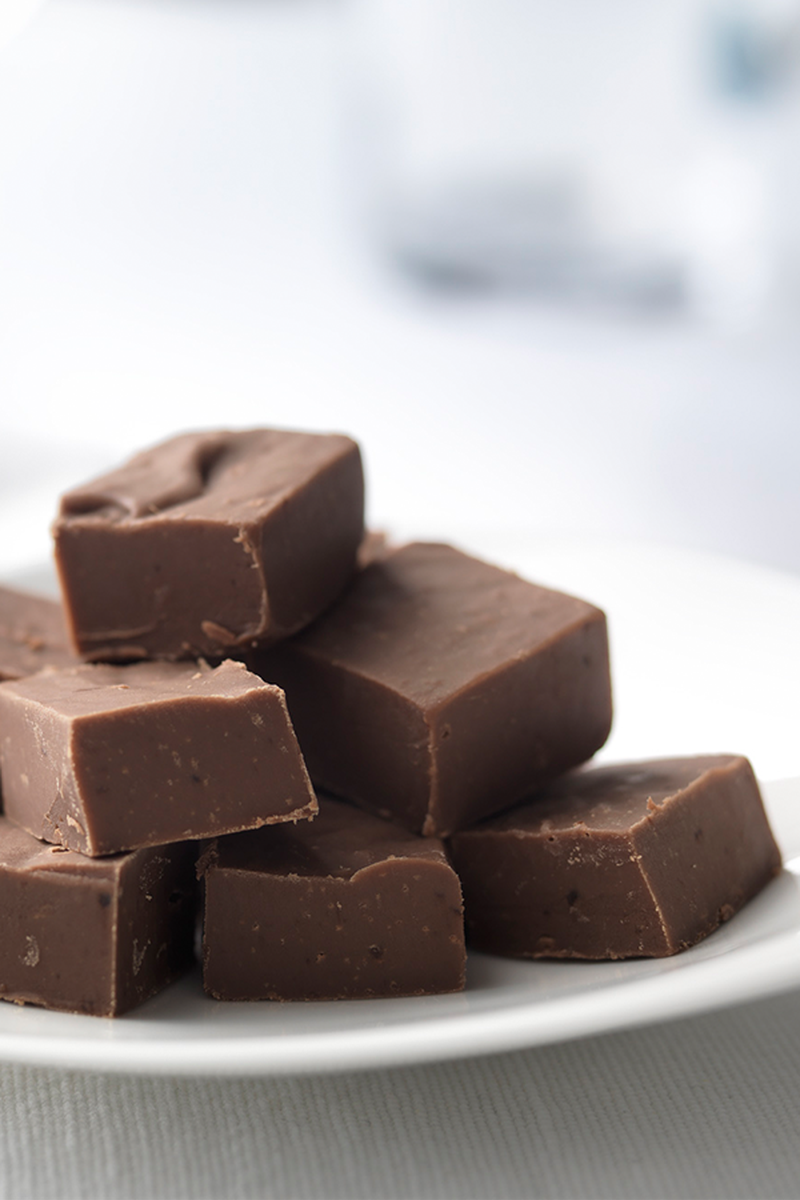
Sous Chef Chocolate Fudge, Miele De Kern
INGREDIENTS
- 500g of chocolate (either dark or milk)
- 1 tbsp of butter
- 1 tsp of vanilla essence
- 1 can of condensed milk
METHOD
- Melt the chocolate in a saucepan over the hob, stirring gently until melted. Alternatively use a Miele Food Warming Drawer at 85°C for 10-15 minutes.
- Once melted, add the butter, vanilla essence and condensed milk and mix well.
- Stir until everything has combined and thickened. At this point, you could add dried fruits or chopped nuts to flavour the fudge if desired. If using a warming drawer, leave the mix in at the same temperature, stirring 3 or 4 times occasionally. The consistency should thicken on each stirring.
- After 2 hours, transfer the mixture into a lined Tupperware container and put in the fridge to cool and set.
- Once cooled and firm, cut into cubes and enjoy.
Visit Miele.co.uk
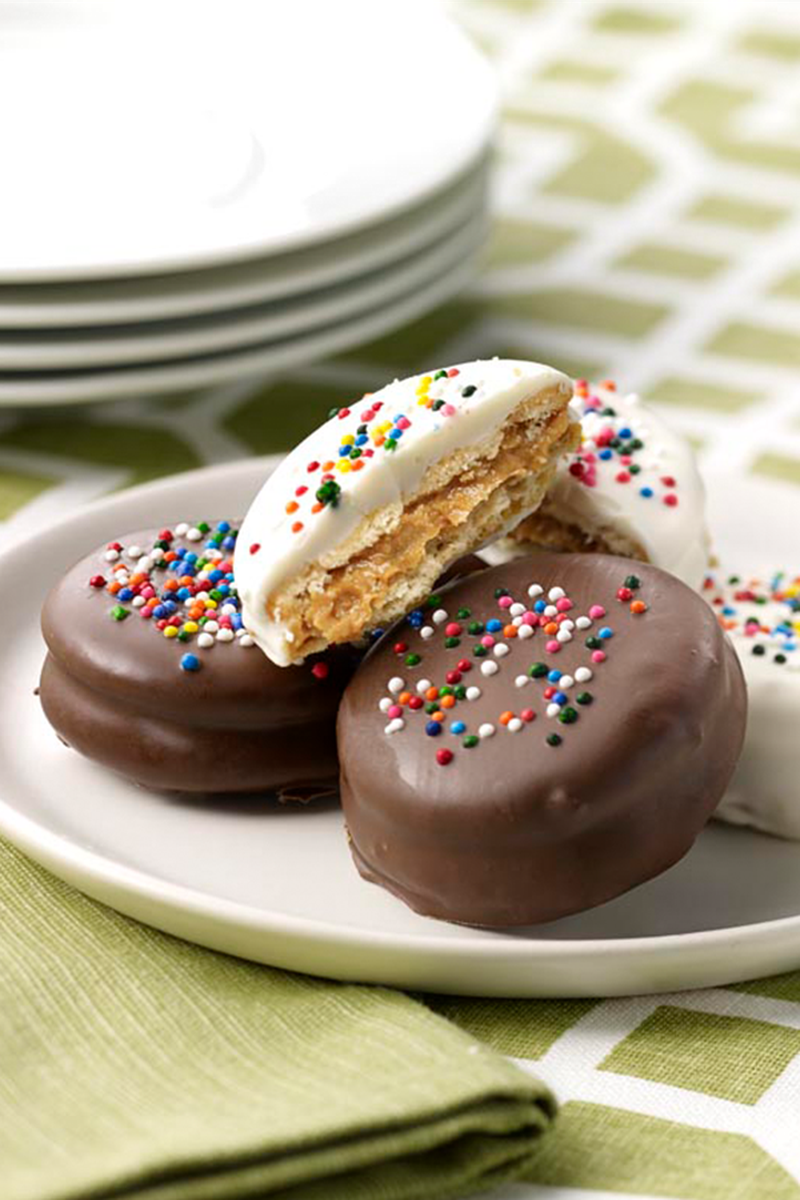
Peanut Butter Chocolate-Covered Biscuit Sandwiches, Skippy
INGREDIENTS
- 340g jar of smooth peanut butter
- 48 round biscuits
- 225g of white chocolate chips
- 10g of butter or margarine
- Hundreds and thousands
- 225g of chocolate chips
METHOD
- Spread one spoonful of peanut butter on each of 24 of the biscuits. Top the peanut butter with the remaining 24 biscuits.
- Line a baking tray with greaseproof paper. Put half of the white chocolate chips
and half of the butter or margarine in a microwaveable bowl. Microwave on
medium for 1 minute or until the mixture can be stirred smooth. - Dip 12 biscuit sandwiches, one at a time, into the white chocolate mixture and place on the baking tray. Sprinkle the tops with hundreds and thousands.
- Put the remaining white chocolate chips and butter or margarine in a microwaveable bowl. Microwave on medium for 1 minute or until the mixture can be stirred smooth.
- Dip the remaining biscuit sandwiches, one at a time, into the chocolate mixture; place on the baking tray. Sprinkle the tops with hundreds and thousands.
- Refrigerate for 5 to 10 minutes or until the coating is set.
Visit PeanutButter.UK.com
DISCLAIMER: We endeavour to always credit the correct original source of every image we use. If you think a credit may be incorrect, please contact us at info@sheerluxe.com.