4 Delicious Salad Recipes
I am truly obsessed with making salads. Salads have always been my favourite thing to cook and the dish I look forward to eating the most. I went to the French Culinary Institute and learned to use butter, bacon and sugar for flavour, and I can appreciate a fresh truffle grated on a decadent pasta. But I’ve always been more interested in making food that felt fresh.
While I never ‘did my time’ in restaurants, those people haven’t cooked for Martha Stewart for over ten years. I have worked with Martha in many different capacities, but one of my favourites has always been making meals for her, especially lunch. Sometimes she would give me a prompt like, “I’m in the mood for something light and fresh and truly delicious,” or she would bring in pastel-hued eggs from her chickens with the deepest orange yolks I’ve ever seen. My whole morning would be spent sorting the perfect crunchy inner leaves from a head of butter lettuce, toasting nuts and creating different vinaigrettes that were bright or creamy, depending on what would complement but not overpower the other ingredients.
Making salads became something of an art form for me. Every dish I made was sort of a salad. As my career began to focus more on food styling, I began to consider the visual composition just as much as the culinary one and making salads became even more fun. A salad has everything going for it – a careful (but playful) balance of flavours, textures, shapes and colours. Just as much as I love making salads, I love sharing them too, and showing you how easy it can be to make a really exceptional one.
Salads shouldn’t be an afterthought. A spread of seasonal salads can make for the most beautiful, colourful and delicious dinner party table. I eat salads first thing in the morning too, whether it’s a big bowl of citrus or thick, juicy slices of tomato – why not?
It’s easy to get lost in making a salad. Unfortunately, a lot of food media today doesn’t focus on the benefits of spending time preparing good food; it’s all about hacks, shortcuts, and how to get something onto the table with as little effort as possible. My salads aren’t difficult or time-consuming, but they are designed to be made with intention. It should help you let go of the weight of the day and any other little things on your mind, too.

Kale Caesar
People are afraid of anchovies and raw egg yolks, but they love caesar salad. Don’t be afraid of these ingredients! This salad is easy to make with a few pantry items. Use the greens you prefer – it’s also great with romaine and little gem lettuce.
Preheat the oven to 205°C. Place the bread pieces on a rimmed baking sheet and drizzle with about 3 tablespoons of oil. Squeeze the oil into the bread – really get in there and try to get it all soaked up.
Sprinkle with salt. Grate a little bit of parmesan over the top. Bake until the croutons are golden brown, 10 to 15 minutes, stirring halfway through.
To make the dressing, finely chop 3 anchovies and 1 clove garlic and then sprinkle about 1 teaspoon of salt over this mixture.
Using the side of your knife, smooth and mash the salt into the anchovies and garlic to create a paste. In a medium bowl, whisk together the egg yolk, the zest of 1 lemon, about 2 tablespoons of lemon juice, and 1 teaspoon of mustard.
In a smooth, steady stream – while whisking – slowly drizzle in about 60ml of oil (you may need a little bit more). Add the anchovy mixture and whisk to combine. Taste and season with additional salt if required.
Remove the tough stems from 1 bunch of kale and tear the leaves into bite-size pieces; wash and spin dry. Add the kale to the bowl with the dressing. Massage it a bit with clean hands, gently squeezing the dressing into the kale to tenderise it – just a couple of times.
Add almost all the croutons, toss, and then transfer the whole thing to a serving platter or plates. Top with the remaining croutons, plenty of parmesan shavings, and fancy anchovies if you’ve got them. Serve with lots of lemon wedges on the side.

Charred Corn, Tomatoes, Halloumi & Chilli Crisp
Halloumi is a firm, briny cheese usually made from goat’s or sheep’s milk – it sears and gets amazing, charred flavour when grilled, but doesn’t melt completely. It makes a really great vegetarian option when grilling, but the truth is, everyone will love it
To make the chilli crisp, peel and thinly slice 3 shallots and the cloves from 2 heads garlic on a mandoline. They should be thinner than a coin. Add the shallots and garlic to a small pot with the oil. Simmer over medium heat for 15 to 20 minutes.
You want them to be deep golden brown, but not too brown (they will start to become bitter!). Meanwhile, peel the ginger. Using a Microplane, grate into a small heatproof bowl (you should have about 2 tablespoons), then add the red pepper flakes, honey, soy sauce and cinnamon.
Carefully strain the pot of garlic and shallots through a fine-mesh sieve over the bowl. Let the crispy bits continue to crisp up on a paper towel-lined plate, and let your oil sit until it cools to room temperature, then combine the oil and crisp bits. This will keep in the fridge for about one month.
Preheat a grill to medium-high, about 220°C. Pull most of the outer husks of 4 ears corn down to expose the kernels so you can remove the silk. Use a paper towel or a vegetable brush to knock off any stubborn stands.
Pull the husks back up. Soak in cold water for about 30 minutes before grilling to prevent the husks from burning – make sure to pat dry before placing on the grill.
Oil the grates of the grill and then place the corn on the grill. Grill until charred on all sides and the corn is tender, about 15 minutes. Remove the corn and let the ears cool just until they are cool enough to handle, then pull the husks down and return them to the grill for a few minutes, so the kernels get a little char on them, about 5 minutes.
Remove from the grill and let them cool again until you can handle them comfortably. Slice the halloumi into 4 pieces and grill until soft and nicely charred, about 3 minutes per side.
Slowly and carefully but with commitment and confidence, stand the corn cob upright and slice off the kernels; transfer to a bowl. Cut 2 tomatoes into 1in-thick wedges and add to the bowl with the corn. Season with salt and pepper.
Scatter the sliced tomatoes and grilled corn on a serving platter. Cut the charred halloumi in half on the diagonal to create 8 triangles and place on top of the corn and tomatoes. Drizzle a generous amount of chili crisp over the top and sprinkle with 1 handful of basil.

Charred Broccoli Soba Bowl With Peanut Sauce
Anything is delicious smothered in peanut butter, but charred broccoli really does it for me. At first glance this recipe seems a little fussy, but after you make it once, you’ll be making it all the time. It packs well for lunch. Hold the fish sauce to make it vegan.
Preheat the oven to 220°C. Set a few layers of paper towels or clean kitchen towels on a large plate or rimmed baking sheet. Cut the block of tofu lengthwise into 4 rectangles and set them down on top of towels, and then put another layer of towels on top of the tofu.
Put a cast iron skillet or another plate with something heavy like a can of tomatoes on top and let the tofu get squeezed for about 15 or 20 minutes (you can do this overnight, but don’t skip this step; it really improves the tofu’s texture). Cut the broccoli into florets.
Transfer the tofu and broccoli florets to a rimmed baking sheet. Drizzle with 2 tablespoons of the chili crisp oil (not the crispy part or the flakes – that’s for later), or 2 tablespoons of neutral oil with the red pepper flakes, and sprinkle with salt.
Roast until the tofu is golden and the broccoli is charred, about 25 to 30 minutes, flipping once. Bring a medium pot of water to a boil and cook 2 bundles soba or rice noodles according to the package instructions, then drain and run under cold water until chilled.
In a large bowl, whisk together the peanut butter, soy sauce, fish sauce, honey, and lime juice and add warm water 1 tablespoon at a time until the desired consistency is reached –you may have to add more or less based on your peanut butter.
Slice the cucumber in half lengthwise. Cut into 6mm slices on a sharp diagonal and add to the bowl with the dressing. Add the noodles to the bowl and toss to combine. Divide the noodle mixture between two shallow serving bowls.
op with the tofu, broccoli and a generous spoonful of chili crisp. Sprinkle with 3 sliced scallions and 1 handful each of basil, coriander and mint on top and serve with lime wedges.

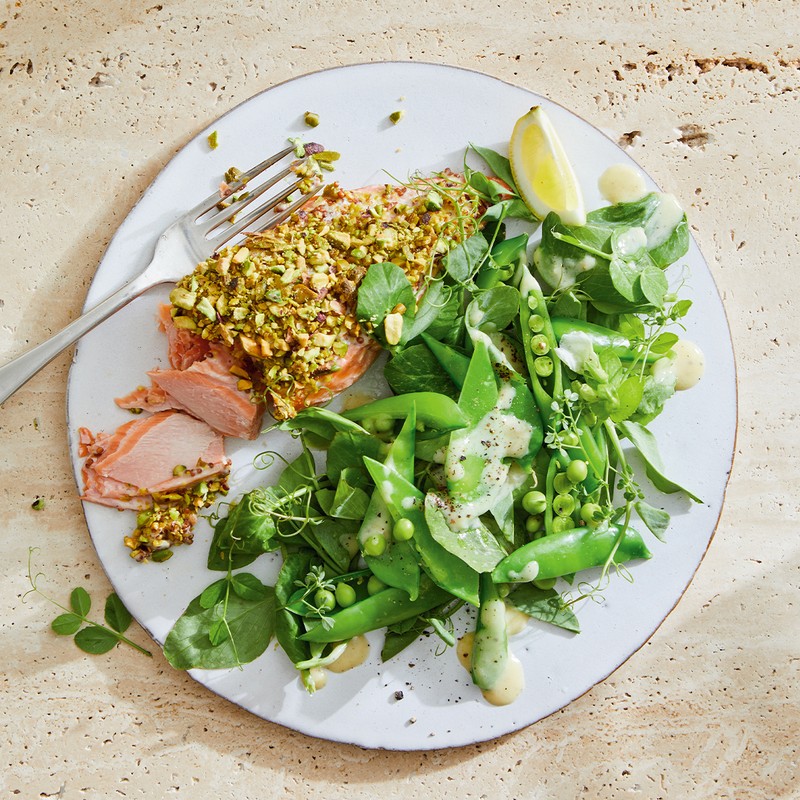
Roasted Salmon With Pistachios & Pea Shoots
Nothing tastes like a pistachio, and a pistachio doesn’t taste like anything else, and when combined with the freshness, the newness of a pea, it is special. Experience the combination for yourself in this meal that comes together fast enough to make on a weeknight but is fancy enough for a dinner party
Preheat the oven to 165°C. Remove the strings of the sugar snap peas. Halve some on the bias. Trim the snow peas and remove the thick stems of the pea shoots.
Place the salmon portions on paper towels and pat dry. Season well with salt and pepper.
In a small cup, stir together 1 tablespoon of creme fraiche and 2 tablespoons of mustard. Place the salmon, what used to be the skin side down, in a 23cm x 33cm baking dish or a rimmed baking sheet and smear the creme fraiche mixture on top. Sprinkle 50g of chopped pistachios on top to coat the fish.
Bake the salmon for 20 to 25 minutes, until completely opaque up the sides of the fish. (If you like your salmon on the medium-rare side, you could go for about 15 minutes.) Bring a small pot of water to a boil and prepare an ice bath.
Blanch your sugar snap peas until crisp tender and bright green, about 2 minutes, and transfer to the ice bath using a spider or tongs. Now blanch your snow peas for about 1 minute and transfer to the ice bath.
In a small bowl, combine the zest and juice of 1 lemon, 1 tablespoon of white balsamic vinegar, 1 tablespoon of creme fraiche and 2 tablespoons of olive oil and season well with salt and pepper.
Drain and dry the peas on paper towels before combining with the pea shoots and the dressing in a large serving bowl. Serve the pea mixture alongside the salmon with lemon wedges.
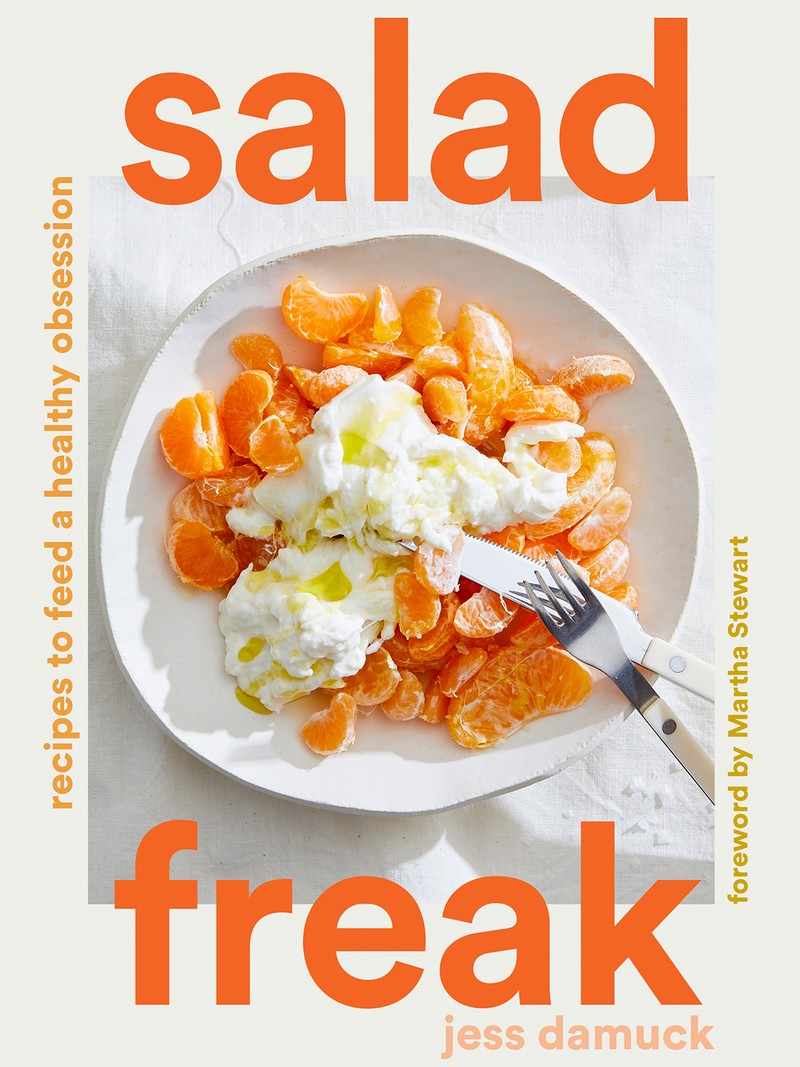
Salad Freak by Jess Damuck is published on 31st March and is available to buy here
DISCLAIMER: We endeavour to always credit the correct original source of every image we use. If you think a credit may be incorrect, please contact us at info@sheerluxe.com.
/https%3A%2F%2Fsheerluxe.com%2Fsites%2Fsheerluxe%2Ffiles%2Fwebsite-images%2F2025%2F03%2Fsign-up-pop-up.jpg)
