4 Gluten-Free Bakes To Make This Week
When my doctor first diagnosed me with IBS and told me my relationship with gluten was over, I didn’t realise it roughly translated as ‘you’re no longer welcome at bakeries anymore’. Bakeries instantly became a no-go zone. As soon as any cakes, cookies or desserts were involved, I was only a spectator. If I was lucky, I’d get a dry, crumbly gluten-free brownie in a plastic wrapper as a consolation prize, but the saddest thing of all is that, over many years, I’d come to accept that this was just how things had to be. Though I often struggled to adjust, I never questioned it.
I’d love to say my passion for gluten-free baking came from a place of joy. But in reality, it was out of sheer frustration. I first stumbled upon an entirely gluten-free bakery many years ago. There was fresh bread – everything from freshly baked French baguettes to boules, alongside a mountainous display of crusty bread rolls – and the counters were crammed with pastries, cookies and tarts. And though it was clear there wasn’t a single crumb of gluten on the premises, it still didn’t stop me asking, ‘Is this gluten-free?’ Nothing looked or tasted gluten-free at all and, up until that point, I thought it was impossible.
My debut recipe book aimed to reunite everyone with all the foods on their gluten-free bucket lists. My second recipe book is dedicated to showing you how to turn your kitchen at home into your very own personal gluten-free bakery. Best of all, I’ve managed to create the recipes in my book – and below – without using lots of strange, unobtainable ingredients or a top-secret flour blend – I actually used a simple, commercial gluten-free flour blend from the supermarket for almost every single one.
Inspired? Here are four gluten-free recipes to try…

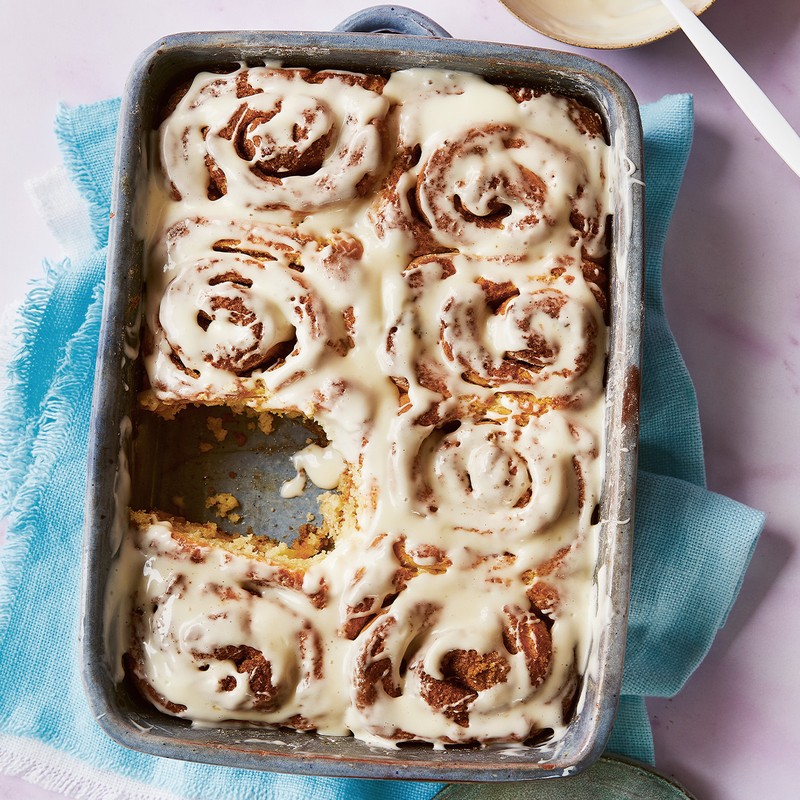
Real Deal Cinnamon Rolls
Believe it or not, my cinnamon rolls are soft, oozing with a sticky cinnamon swirl and slathered with frosting (or a simple, quick glaze if you prefer). This is definitely not one to be rushed, but after a decade without even being able to eat one of these, a little chilling and proving time is nothing.
1. In a jug, stir together your warm milk, yeast and 15g of sugar. Allow to stand for 10 minutes until frothy.
2. In a large bowl or the bowl of a stand mixer, mix together your flour, tapioca starch, milk powder, xanthan gum, baking powder, psyllium husk powder and remaining sugar until well combined. Add the vinegar, egg, melted butter and yeast mixture.
3. In a stand mixer fitted with a beater attachment, or using an electric hand whisk, mix on a high speed for 3-5 minutes until well combined.
4. It should look thick and sticky. Place in a clean bowl, cover and place in the fridge for at least 4 hours (or overnight) to completely chill (or chill in the freezer for 2-3 hours). After chilling, I check the dough’s internal temperature using a digital food thermometer – it usually gets down to about 8°C-13°C. This will ensure the dough is workable and no longer sticky.
5. Lightly grease a baking tin, about 28 x 18cm, or two 20cm round cake tins.
6. Place your chilled dough on a surface well dusted with tapioca starch. Knead until smooth then roll out to a rectangle 40 x 25cm and 5mm thick. Spread the softened butter all over your dough. Mix together the brown sugar and cinnamon, then sprinkle this over the butter. With a long side closest to you, cut the dough into 8 strips (for large rolls), or 16 (for small rolls). Roll each into a tight swirl and place in the tin(s), with a little room between each. If they won’t all fit, pop any extra in another tin. Cover and leave to prove in a warm spot (not too warm or the butter will melt) for 1-2 hours until doubled in size.
7. Preheat your oven to 180°C/160°C. Bake for 35 minutes until golden. Halfway through baking, cover with foil (shiny side up) if they’re getting too dark. While baking, prepare the frosting or glaze.
8. For cream cheese frosting, beat together the butter, cream cheese and vanilla extract until smooth. Add the icing sugar and mix well. Add enough milk to achieve a spreadable consistency.
9. To make a simple glaze, mix the icing sugar and vanilla together, then add enough milk or water so that it is smooth but thick and spreadable.
10. While the rolls are warm, spoon and spread the frosting on or drizzle over the glaze. Enjoy fresh and warm on the day that they’re baked or refresh in the microwave.

Mini Ricotta Fried Doughnuts
This is, by far, my easiest and quickest fried doughnut recipe – simply mix up the batter, fry and enjoy, no yeast, proving or dough shaping necessary. Also no, these don’t taste like cheese. The ricotta gives these a pillowy soft, light and springy middle, yet with a golden, crisp exterior thanks to the frying process. Roll in granulated sugar for that distinctive doughnut-like finish and serve with jam for dipping.
1. In a large mixing bowl, mix your ricotta, eggs, vanilla and sugar together until combined and smooth (I use an electric hand whisk for this).
2. In a medium mixing bowl, mixthe flour, xanthan gum and baking powder, then add it to the main bowl. Mix until well combined, then chill the batter in the fridge while you heat your oil.
3. Half-fill a large, deep, heavy-based saucepan with vegetable oil and place over a medium heat for 15 minutes or until it reaches 170°C. If you don’t have a digital food thermometer, check the temperature of the oil using the wooden spoon test.

Millionaire’s Shortbread
If I had my own bakery, gluten-free millionaire’s shortbread would most definitely be on the menu all day, every day... unless I accidentally ate all of the stock myself, which is a possibility. This is a reader favourite from the blog that so many have tried, tested and loved, so it certainly earned its place in my second book. Feel free to blind taste test this one on people who can eat gluten – nobody will notice the difference.
1. Preheat your oven to 180°C/160°C Fan. Grease a 23cm square baking tin and line it with non-stick baking parchment, leaving a little overhang to help you remove them from the tin later.
2. In a large mixing bowl, cream together your butter and sugar until light and pale (I prefer to use an electric hand whisk or a stand mixer for this). Mix in the flour and xanthan gum, then use your hands to bring the dough together into a ball – it might be slightly crumbly at this point, but that’s fine.
3. Press your dough into your prepared tin, pushing it right into the corners and trying to make it flat and even. Prick the top all over with a fork and bake in the oven for 20-22 minutes until slightly golden on top. Set aside to cool.
4. For your caramel layer, place all the ingredients in a small saucepan over a low-medium heat. Allow the butter to melt and the sugar to dissolve, then mix well to ensure it doesn’t stick to the bottom and is all well combined. Turn the heat up so the mixture starts to bubble a little, and keep stirring continuously for about 5-8 minutes or until the mixture has thickened and developed into a dark, golden colour.
5. Pour your caramel on top of your cooled shortbread layer, spreading it so that it’s level and even. Place in the fridge to set for at least 2 hours. Once chilled, remove from the fridge, ready to add the final layer.
6. In two separate small bowls, melt both chocolates. You can do this in the microwave (mixing in between short bursts) or in a heatproof bowl over a saucepan of boiling water, without letting the water touch the bowl, and stirring until melted.
7. First, pour the milk chocolate all over the top of the set caramel layer. Spread it out in an even layer, right to the edges. Quickly spoon big dollops of white chocolate on top and use a skewer to create a swirly pattern. It’s important to work quickly with the white chocolate as the milk chocolate will begin to set as soon as it hits the cold caramel.
8. Place back in the fridge for around 1 hour and 30 minutes, until the chocolate has fully set.
9. Remove the millionaires from the fridge about 30 minutes before you want to cut it (to prevent the chocolate top from cracking). Remove it from the tin and, using a large knife warmed in hot water, cut into 9 large or 16 smaller squares.
10. Store in an airtight container or freeze for 2-3 months.

Baked Raspberry Cheesecake Bars
Yes, these do taste as good as they look! Each slice has a crisp, buttery biscuit base, topped with a delightfully creamy filling that’s packed with gooey raspberries and cut with sweet and sharp raspberry sauce. If you’re still reading this, that’s probably a good sign you should go and make them now.
1. Preheat your oven to 180°C/160°C Fan. Line a 23cm square baking tin with non-stick baking parchment.
2. Place a small saucepan over a medium heat, add the raspberries and allow to completely break down. Sieve them into a bowl, then place just the liquid back in the saucepan and discard the rest. Continue to heat until the mixture reduces and thickens slightly. Remove from the heat and allow to cool completely.
3. Next, make your base. In a food processor, blitz your biscuits into a crumb-like consistency – not into a fine dust! Alternatively, pop the biscuits into a zip-lock bag and bash them with a rolling pin. Transfer the crushed biscuits to a large mixing bowl, add the melted butter and mix well until combined. Spoon your crushed biscuit mixture into the lined tin and compact it into a nice, even layer. Bake in the oven for about 10 minutes, then remove and allow to cool. Reduce the oven temperature to 140°C/120°C Fan.
4. Meanwhile, for the filling, mix together the mascarpone and sour cream in a large mixing bowl until smooth. Add your sugar and cornflour and mix until combined. Crack your eggs in one at a time, mixing between each addition. Finally, add the lemon zest, juice and vanilla extract, and mix once more.
5. Mix 2 tablespoons of the cheesecake filling with the cooled raspberry reduction until lovely and smooth. Spoon the rest of the cheesecake mixture on top of the cooled base, then spoon the raspberry mixture on top of that. Use a skewer to create a swirly pattern, and press extra raspberries into the top.
6. Bake in the oven for 40-45 minutes until slightly wobbly and a little brown around the edges. Instead of removing the tin from the oven, leave it in and turn the oven off, leaving the door ajar. Allow to completely cool. Once cooled, place in the fridge to chill for at least 3 hours, but ideally overnight, then cut into bars to serve.
7. Store in an airtight container or freeze for 2-3 months.
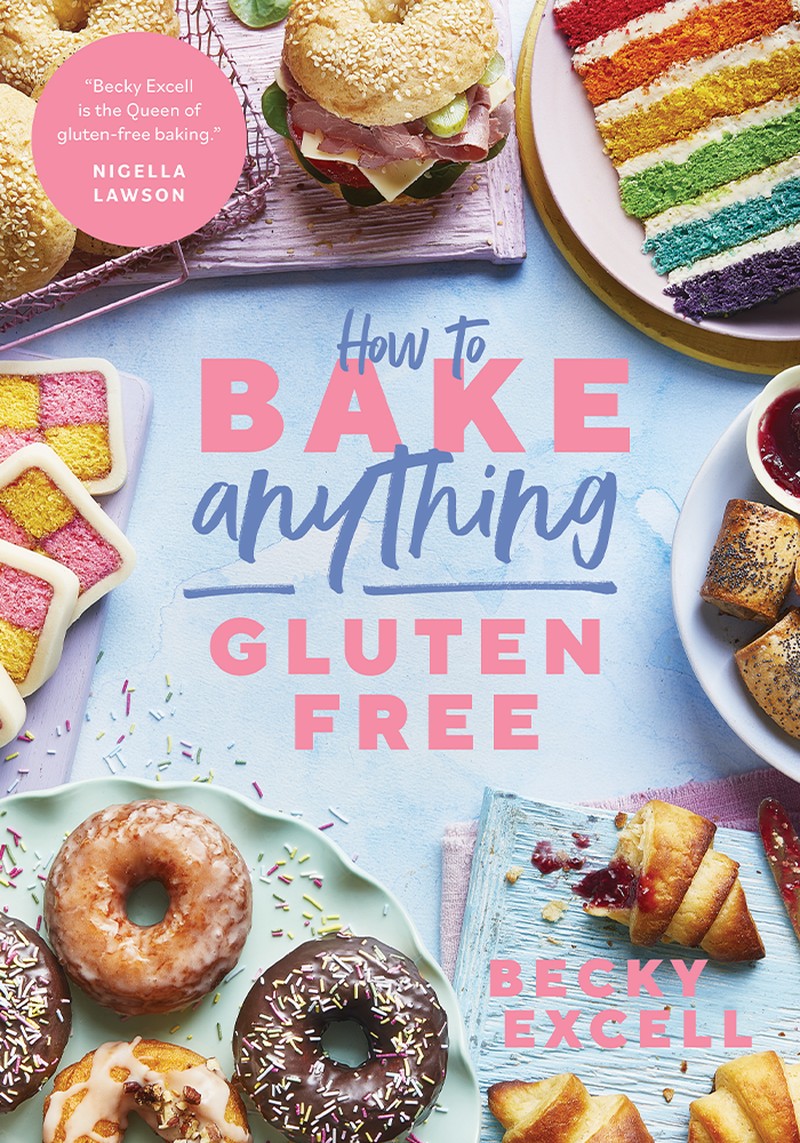
Recipes extracted from How To Bake Anything Gluten Free by Becky Excell (Quadrille, £20 RRP).
Or continue to comment as a Guest below
DISCLAIMER: We endeavour to always credit the correct original source of every image we use. If you think a credit may be incorrect, please contact us at info@sheerluxe.com.
/https%3A%2F%2Fsheerluxe.com%2Fsites%2Fsheerluxe%2Ffiles%2Fwebsite-images%2F2025%2F03%2Fsign-up-pop-up.jpg)
