The SL Guide: 9 Household Jobs To Know About
DEFROSTING THE FREEZER
Start by… turning the freezer off at the mains and moving any food items into cool bags. Remove compartments or drawers which can be taken out and set them aside for cleaning. Be sure to lay something on the floor – newspapers will do the trick – and old towels inside the freezer to soak up water as the ice melts.
Then… check to see if there’s a drainage hose or tray under your freezer, and be ready to empty the contents as the ice turns to water. For health and safety reasons, don’t be tempted to speed up the process by using so-called ‘hacks’ such as hairdryers or car de-icer.
To finish the job… give surfaces a thorough clean and dry them down with a towel before switching the freezer back on. Give it time to cool down again, and check for any food which has started to defrost before putting it back in. It might be the case it shouldn’t be re-frozen.
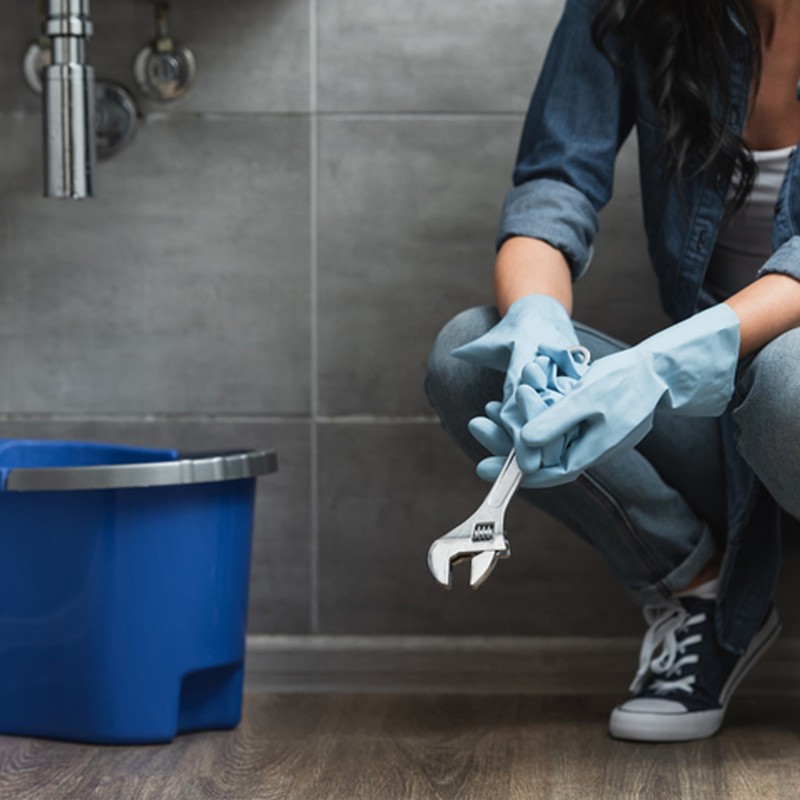
UNCLOGGING A DRAIN
Start by… checking how bad the blockage is by flushing it with boiling water. If it’s minor, this might be all that’s needed. A word of caution – the boiling water trick is only appropriate for metal pipe. PVC pipes risk being melted or the joints softened by water hotter than 175°C. Try using a basic plunger to loosen blocked toilets before calling in the professionals, too.
Then… if the problem persists, get your hands on a drain snake.It’s possible to construct a basic drain snake from an old, straightened-out coat hanger, but proper augers – professional plumbing snakes – are available to buy online at various price points. It’s particularly good for blocked shower drains, which often get clogged up with hair and soap.
To finish the job… seek out a chemical de-clogger, many of which can be bought from your local supermarket, or made at home using a mix of vinegar and baking soda. Just be sure to pick one which is designed for your particular system, and wash your hands and the area thoroughly after use to avoid any cross-contamination. Be warned – professional plumbers see chemical de-cloggers strictly as a last resort, and they’re likely to be ineffectual in cases where the blockage has already caused water to back up.
CHANGING A SMOKE DETECTOR BATTERY
Start by… adhering to proper fire safety regulations and test your smoke alarms at least once a month. From there, look to change the batteries at least once or twice a year to ensure alarms keep working effectively. Some alarms will start to make a chirping noise when batteries need replacing, with most models using a lithium nine-volt battery.
Then… remove the outer case of your alarm, usually with a slight twisting motion. Inside, you’re likely to find the sensing chamber, a loud horn and a battery (and in some cases, house voltage power source). Unclip the old battery and insert the new one, ensuring the negative and positive terminals are orientated correctly.
To finish the job… snap the cover shut or lock the body of the smoke detector back into its base. Once done, remember to test the battery by pressing the test button on the outer case to see if it chirps or beeps.
SHUTTING OFF THE WATER
Start by… locating your internal stop tap – aka the stop valve or stop cock – to find the point where water is supplied to your property. For flats, this is usually located under the kitchen sink, although larger properties might have taps in a basement, airing cupboard or under the floorboards near the front door. External stop taps can be used to isolate water to your property but should only ever be handled by professionals, and you may need to contact your water company for permission ahead of time.
Then… turn the valve clockwise to close it and limit the amount of water passing through the house. It may take a few minutes for the water to stop altogether, but if it doesn’t, it’s worth contacting a plumber to see if there’s a bigger problem.
To finish the job… turn the valve anticlockwise to turn the water back on – just be careful to turn it slowly, and never force it, as doing so could significantly damage the tap.


RESETTING THE ELECTRICITY
Start by… locating your fuse box. Depending on the property this could be in a coat closet, a garage or hallway. Inside, you’ll find the main switch, which turns off the electricity supply to your home; fuse switches that trip to protect the appliances in your home, if there’s a fault in the circuit; and RCDs – Residual Current Devices – which trip and turn off the electricity if the circuit is considered dangerous.
Then… to restore the lights and appliances in your home, lift the cover of your fuse box and look to see if all fuse switches are on. If they are, they should be up, while any that have tripped are likely to face down. For any that are down, move them back into the up position. If that doesn’t do the trick, it could be one of the RCD switches which has tripped. Check these too.
To finish the job… check which appliance might be at fault for causing the trip. The fuse box will probably have little labels under each switch telling you which circuit they manage, which will help identify where the problem is in case it needs to be rewired or replaced.
HANGING A PICTURE
Start by… checking what type of wall you plan to hang your picture to. Internal walls aren’t often made from solid brick or stone, which makes them easier to affix things to. But exterior walls might have a thin layer of plaster covering solid brickwork, which could call for a pre-drilled hole and wall anchor over a simple metal picture hook.
Then… find where on the wall you’d like the picture to sit. It’s a common mistake to hang pictures too high: instead, try to keep artwork at eye level, or at least a quarter of wall space free from the ceiling down. Measure the entire space and divide appropriately lengthways and widthways to find the right placement, and use masking tape to mark it out before you start hammering.
To finish the job… hammer or drill the appropriate fixings into the wall, making sure to take it slowly to avoid paint or plaster from flaking. Once hung, pictures can be adjusted using their string to settle them into place, while a spirit level will tell you if it’s straight or not.
PUTTING UP A FIXED SHELF
Start by… familiarising yourself with some of the jargon. For instance, noggins are the horizontal timber lengths that are fixed between the studs, while studs are the vertical timber lengths fixed between the noggins. It’s important to know about the construction of the wall before you start work, as well as whether there are pipes or wires which might be affected. Finally, find out if the shelves you intend to put up have brackets or not. If they do, this is known as fixed shelving, while those without are referred to as floating.
Then… mark where the first bracket should be and the distance to the next bracket. Use a spirit level to check the marks are straight to avoid an uneven shelf. Holding the bracket to the wall, use a pencil to make marks through the drilling holes onto the wall, so you know where to drill. Once you’re confident with the placement, drill into the wall and twist the screws through the brackets to fix.
To finish the job… lay the shelf across and repeat the process for marking where the fixing screws underneath should go. Take the shelf down and drill pilot holes on the bottom for the short screws, but be careful not to go right through to the other side. Replace the shelf and twist in the fixing screws.
BLEEDING A RADIATOR
Start by... turning the heating on so that all the radiators warm up. Go around the house or flat and test for cold spots or gurgling noises to find which ones need bleeding.
Then…turn the heating off. Take the radiator bleed key, and insert into the bleed valve at the top and to the side of the radiator (it usually looks like a round hole with a square inside). Turn the valve anticlockwise and wait to hear a hissing sound as the air begins to escape – it might be hot, so stand back. If you don’t have a radiator vent key, it’s sometimes possible to use a flat-headed screwdriver on modern radiators.
To finish the job… hold the radiator bleed key until air stops coming out. When only water is dripping from your radiator, turn the bleed valve clockwise to seal the radiator, taking care not to overtighten.
REWIRING A PLUG
Start by…assembling the right tools, which are likely to include a screwdriver. If you need to strip back the insulation and trim the wires, you might need a sharp knife and side cutters, or a wire stripping tool.
Then…cut off about 4cm of the outer insulation. The easiest way to do this is to slit the outer insulation of the cable lengthways and then peel away. Separate the wires and use the plug as a gauge to cut the wires to the correct length, being sure to keep the earth wire long, and the live wire, short. Remove about 5mm of insulation from the end of each wire using wire strippers and follow the guide on the inside of the plug cap to know where to place each wire. To connect each wire to the correct terminal, slacken the screw and push the bare wire into the hole and re-tighten the screw.
To finish the job…tighten the cord clamp over the cable, ensuring it’s not gripping the coloured wires. Finally, check that the correct fuse is fitted (use the 700W rule if you’re unsure) and ensure there are no loose strands of wire in the plug. Replace the plug's cover and tighten the screw.
DISCLAIMER: We endeavour to always credit the correct original source of every image we use. If you think a credit may be incorrect, please contact us at info@sheerluxe.com.
/https%3A%2F%2Fsheerluxe.com%2Fsites%2Fsheerluxe%2Ffiles%2Fwebsite-images%2F2025%2F03%2Fsign-up-pop-up.jpg)
